DSP Build
Compiling Project and Downloading Image
The way of using project_dsp on Windows or Linux GUI Xplorer are very similar to each other. Here, we use the building process on Windows as an example.
Building Project with CMD (Linux)
On a Linux server, you can run auto_build.sh to compile the default project.
cd project/auto_build/
chmod +x auto_build.sh
./auto_build.sh
Image path: project/image/dsp_all.bin
The configuration file for the automatic compilation script is project/auto_build/dsp_batch.xml.
In this script, you can modify the project configuration (HIFI5_PROD_1123_asic_wUPG or HIFI5_PROD_1123_asic_UPG).
Note
Add the Xtensa Tools directory to your system PATH. In our case, it is /opt/xtensa/XtDevTools/install/tools/RI-2021.8-linux/XtensaTools/bin.
Building Project with Xplorer GUI
Importing Project to Workspace
Click Browse to set the workspace to
<dsp_sdk>\project.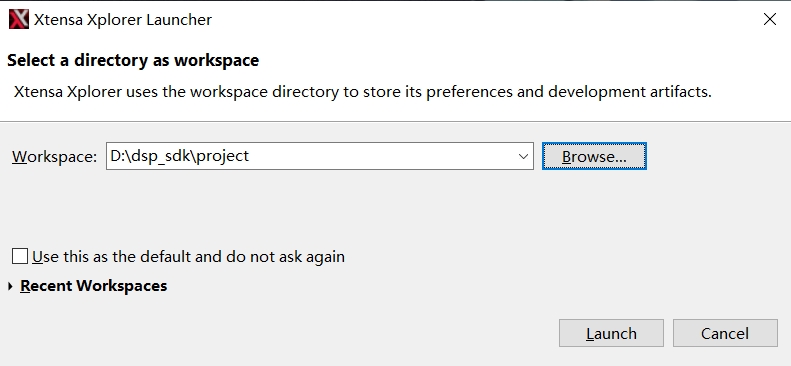
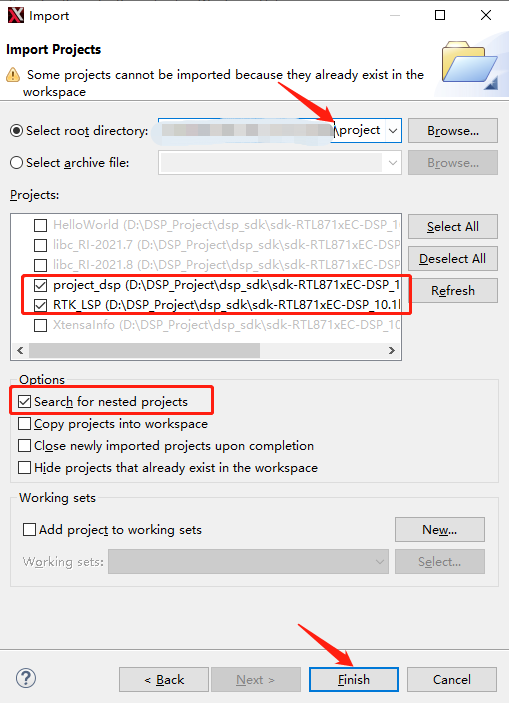
You will find a HelloWorld project added to the Project Explorer automatically after going over all steps in the previous chapters. Now let’s add project_dsp included in the SDK into the workspace.
Click , then click

Set contents in the read box as above, and click Finish.
Building Project
In the upper part of Xtensa Xplorer, set P to project_dsp, C to HIFI5_PROD_1123_asic_UPG (or HIFI5_PROD_1123_asic_wUPG), T to Release, then click Build Active.
The generated image will be placed under project\image, the name of the image is dsp_all.bin.

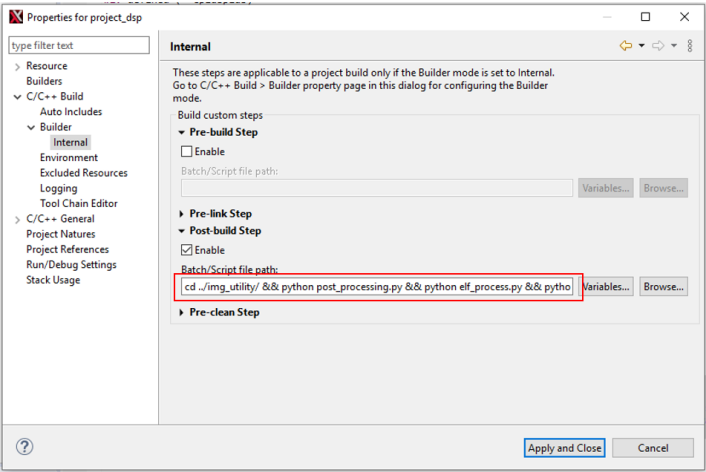
Here are some useful scripts:
By default, when generating DSP firmware, the corresponding disassembly will not be generated. If disassembly is required to debug the code you need to enable it in the post processing script
<dsp_sdk>/project/img_utility/code_analyze.py: set ENABLE_Disassembler to 1. Generating disassembly may slow down the compile process, so only enable disassembly when necessary. The generated ASM file is<dsp_sdk>/project/image/project_dsp.asm.To check function or data location, you can view the map file generated by the connector:
For Xplorer-GUI:
<dsp_sdk>/proiect/proiect_dsp/bin/HIFI5_PROD_1123_asic_UPG/Release/proiect_dsp.mapFor Linux command line:
<dsp_sdk>/auto_ws/proiect/dsp/bin/HIFI5_PROD_1123_asic_UPG/UPG/Release/project_dsp.map
Note
Add the Xtensa Tools directory to your system PATH. In our case, it is
C:\usr\xtensa\XtDevTools\install\tools\RI-2021.8-win32\XtensaTools\bin.Make sure you have permissions to the files in the image and img_utility folder.
Install python and add its path to environment variable to make sure that post-processing works well. Any version newer than 3.8.0 should be fine. And we use python as the command, you may have to change the command if your command is python3 or python3.8.
Enabling DSP in KM4 Core
By default, the DSP is not enabled. It requires KM4 core to power it on.
Enable DSP core in SDK menuconfig:
cd {SDK}/amebalite_gcc_project
make menuconfig
DSP Image
There are two schemes for users to load the DSP image.
We choose the scheme of DSP Image within Application Image and use kr4_km4_dsp_app.bin in the following operations.
In this scheme, there are two slots in Flash layout called IMG_APP_OTA1 and IMG_APP_OTA2 respectively.
Since the DSP image is merged into the application image. In order to avoid issues such as DSP boot fail after the DSP image
is updated through OTA application when there is only one slot for DSP. For MP devices,
the scheme of the DSP image within application image is recommended, which DSP can choose to boot from OTA1 or OTA2.
After choosing this scheme, there is only one application image called kr4_km4_dsp_app.bin needed to be downloaded as shown below.

Steps of generating kr4_km4_dsp_app.bin are:
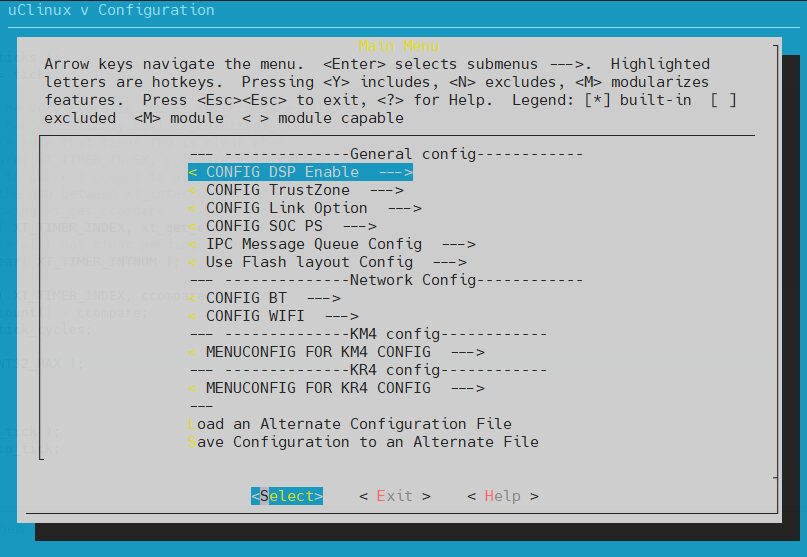
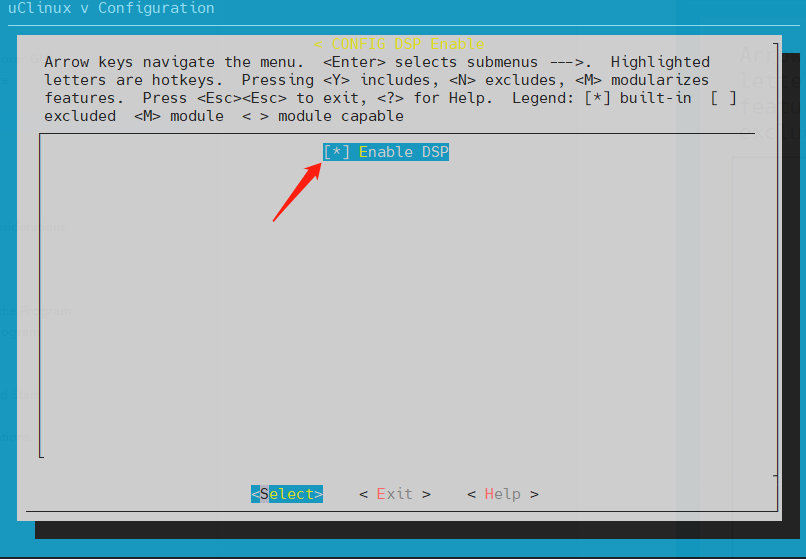
Navigate to project and open configuration menu.
Select to enable the configuration of
DSP within APP image.Select to set path of
dsp.bin, click Enter to save.*** --------MENUCONFIG FOR General--------- *** CONFIG DSP Enable ---> [*] Enable DSP [*] DSP within APP image (../component/dsp) DSP_IMAGE_TARGET_DIR CONFIG TrustZone ---> ...
Note
The DSP_IMAGE_TARGET_DIR is relative to the amebalite_gcc_project.
Save and exit.
For example, once the DSP SDK compilation is completed, two images will be generated: dsp.bin and dsp_all.bin,
which are located in the {DSP_SDK}\project\image directory.
Copy the
dsp.bininto{SDK}\component\dsp, so the path ofdsp.binis../component/dsp.Set the path as described in Step 3 above. Check the path in
SDK\amebalite_gcc_project\menuconfig\.config.# CONFIG DSP Enable # CONFIG_DSP_EN=y CONFIG_DSP_WITHIN_APP_IMG=y CONFIG_DSP_IMAGE_TARGET_DIR="../component/dsp" # end of CONFIG DSP Enable
Rebuild the project using the following commands. The
kr4_km4_dsp_app.bincan be found in{SDK}\amebalite_gcc_project.cd amebalite_gcc_project ./build.py
In this scheme, there is only one slot in Flash layout called IMG_DSP for the DSP image.
When the DSP application is modified, users only need to re-download the DSP image called dsp_all.bin to IMG_DSP as shown below.
So when in device DSP-development stage, we recommend this method to develop the DSP application conveniently and efficiently.

To choose this scheme, users can disable the configuration of DSP within APP image by the following steps:
Navigate to project and open configuration menu.
cd amebalite_gcc_project
./menuconfig.py
Remove the selection .
*** --------MENUCONFIG FOR General--------- ***
CONFIG DSP Enable --->
   [*] Enable DSP
   [ ] DSP within APP image
CONFIG TrustZone  --->
...
Save and exit.
Note
This scheme should be used only in device DSP-development stage.
Downloading Bin Files
Currently, we support two Flash partitions for downloading DSP image via Realtek ImageTool:
Download the DSP firmware and MCU application firmware separately.
This method is convenient for development. The image names are shown in the following figure, and the image address refer to the DSP IMG Physical address in Flash Layout table.

Combine DSP firmware and MCU application firmware into one firmware then download together.
This method is convenient for OTA upgrade. For details, refer to the of OTA section.
Reset the board after download process is over.
You should see Hello DSP World from a UART tool.
Note
The Hello DSP World message may mixed with messages printed out by KM4/KR4. You can print more messages from DSP to see it clear.
Troubleshooting
Problem: python is not recognized as an internal or external command.
Solution: Maybe python as an environment variable, if this is the case, add python as an environment variable.
Maybe the path where python.exe (Windows) or python.bin (Linux) is not added to your environment variable. In this case, add the path as an environment variable should solve the problem.
And we find another problem rarely occurs in our experiment: on some pc, we have to python3.8 to run python in command (Windows) or terminal (Linux). Typing python will report the same error. Maybe python.exe or python.bin is renamed as python3.8. You can create short cut named python pointing to python3.8.exe on Windows, or create a soft link on Linux. Suppose python3.8.bin is installed under usr/bin, type sudo ln -s python3.8 python on Linux.
Adding Folder or Files into Project
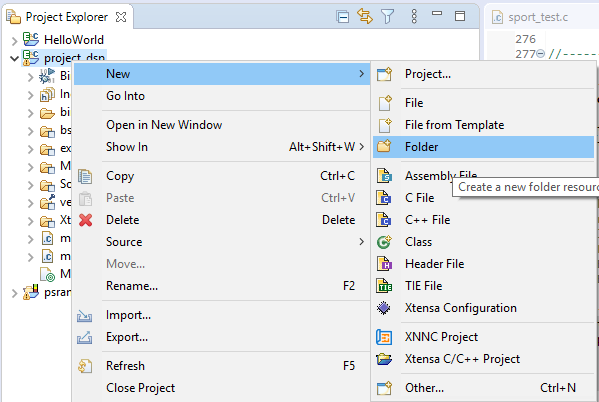
We use virtual folder to manage project files. When using virtual folder, you delete files from your project, but the one on your disk remains intact. And it won’t copy files to your project folder. Suppose our application files test1.c and test2.c are placed in a folder named application, we add these files to our current project.

Create a virtual folder named application. Right click on project_dsp, then select .
Fill the Folder name with
application, choose Folder is not located in the file system, and then click Finish.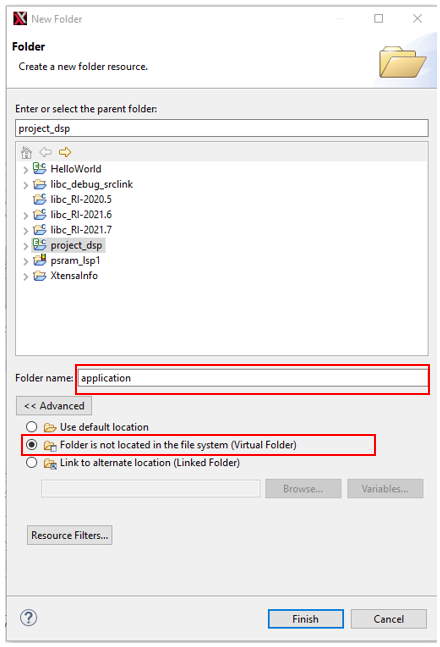
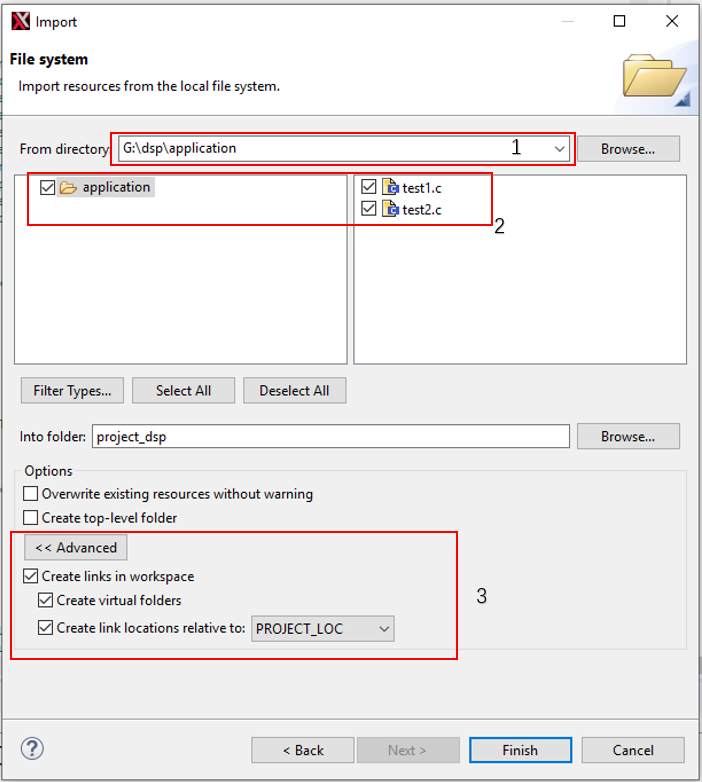
Right click on application, and choose Import.
Click .

In place 1, browse to the address of your folder. In place 2, choose the files you want to include. Click Advanced and tick the place 3.
Caution
When adding project files, be sure to use relative paths. As shown in the figure above, click Create link locations relative to: and set it to PROJECT_LOC.
Setting the Project
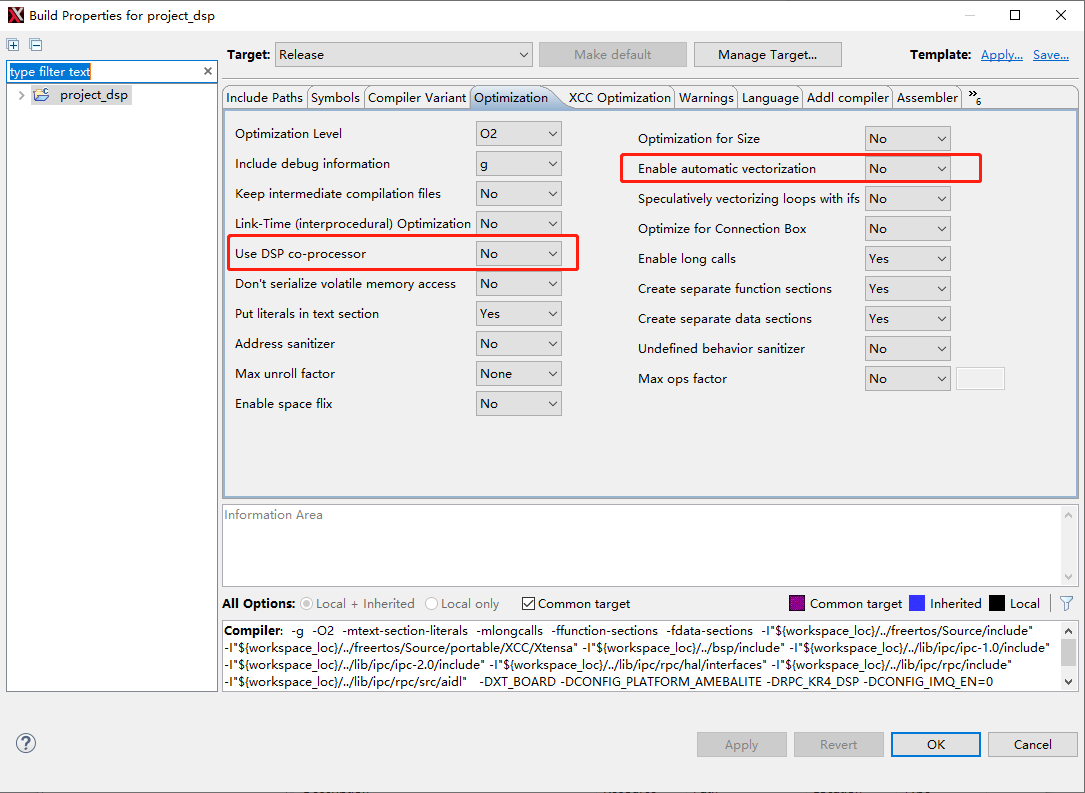
Optimizing DSP Code Considerations
Co-processor, O3 and SIMD compilation options can greatly improve the utilization of DSP hardware resources. But these options are not available for all codes. With -O3 option, the compiler may significantly adjust the order of execution. This option is generally safe, but there is a small chance of problems. Some RTOS source files and other ISR handlers cannot use co-processor and SIMD vector options, such as -LNO:simd and -mcoproc.
Reducing DSP Image Size
Sometimes our code would define some functions and functions that are temporarily unused. Although we do not use these functions, they often waste our ROM and RAM space. In order to solve this problem, we recommend some compile and link parameters:
Add
-ffunction-sectionsand-Osoption to compiler:

Add
-Wl,-gc-sectionslinker option: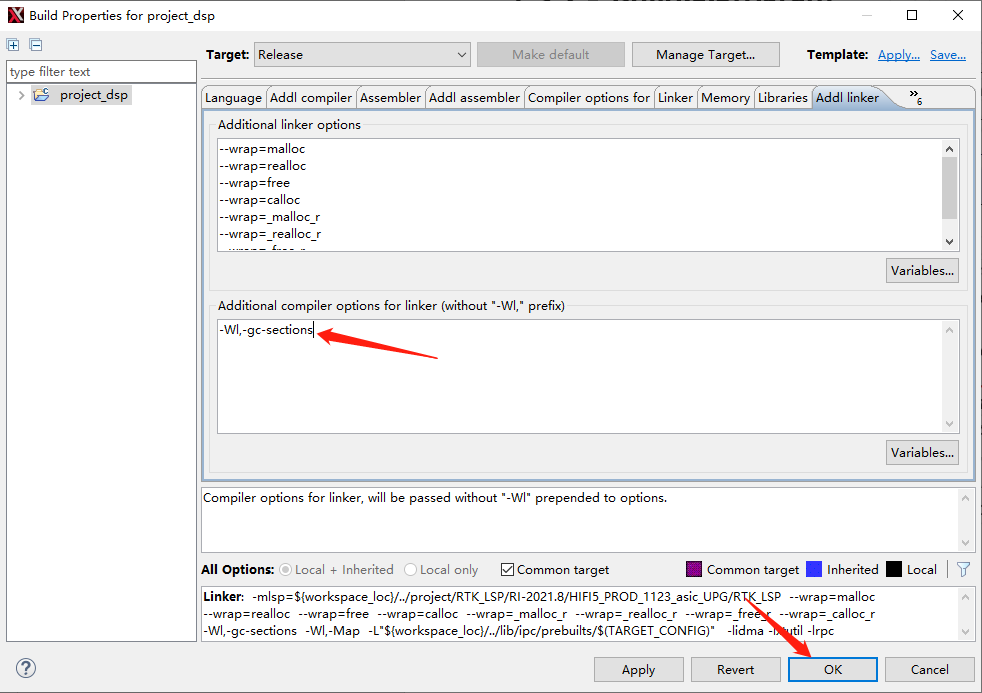
This approach may encounter the following warnings (which can be ignored):
ld: warning: The min-sizing binary cannot be generated if -gc-sections is specified.
In this case, the contents of the .command and .ipc_table sections cannot be loaded into the image because they are not explicitly called. In the link script
RTK_LSPldscriptself32xtensa.x, add KEEP attribute to these two segments..ipc_table : ALIGN(4) { _ipc_table_start = ABSOLUTE(.); KEEP(*(.ipc_table)) . = ALIGN (4); _ipc_table_end = ABSOLUTE(.); } >psram0_seg :psram0_phdr .command : ALIGN(4) { _command_start = ABSOLUTE(.); KEEP(*(.command)) . = ALIGN (4); _command_end = ABSOLUTE(.); } >psram0_seg :psram0_phdr
Note
This linker script is overwritten after each modification of the LSP. The script needs to be reworked.
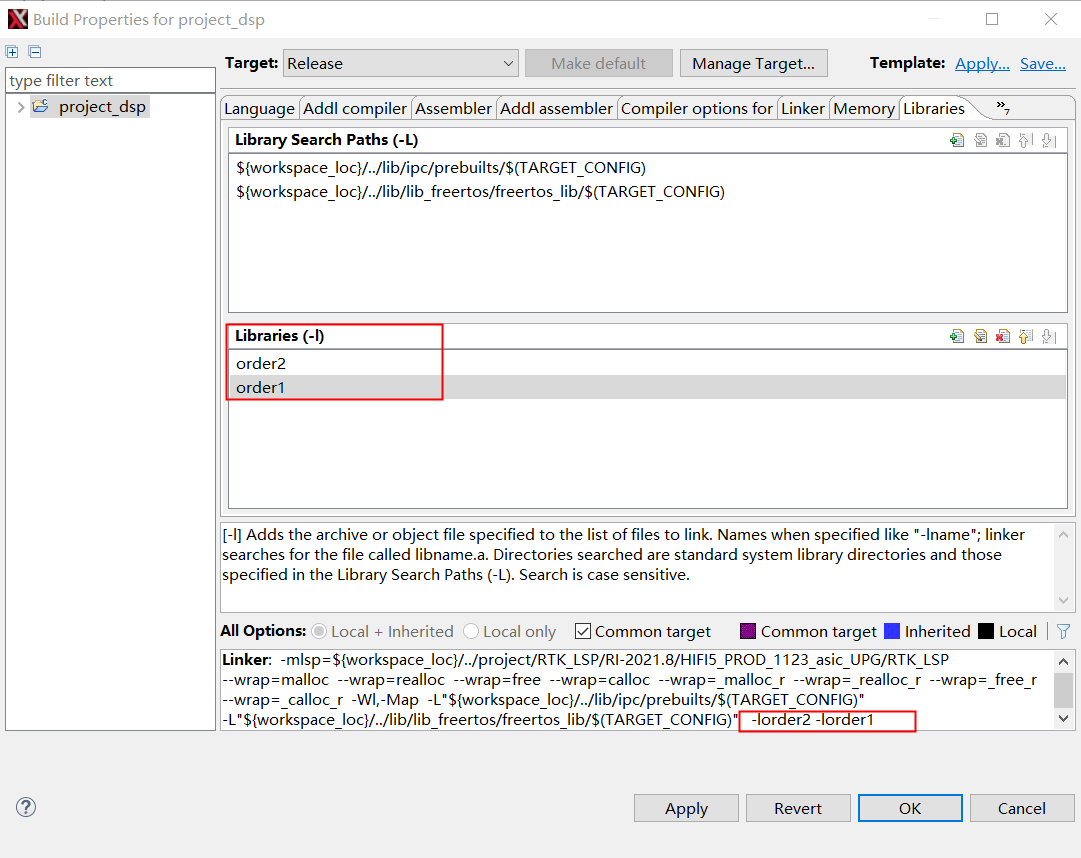
Library Order
When linking static libraries, if there are dependencies between multiple static libraries, there will be link order problems between the dependent static libraries. This needs to be paid attention to when using a static library, otherwise a link error that the symbol cannot be found will be reported.
For example, liborder2.a depends on liborder1.a, and the final executable test depends on liborder2.a, the link options should be -lliborder2.a -lliborder1.a, otherwise it will report that some symbols in liborder1.a are undefined.